Get started
#Overview
The Sygnal Pixel is a snippet of JavaScript code that loads a small library of functions to track ad-driven visitor activity on your website. It uses cookies to match website visitors to their respective user accounts across integrated platforms. Once matched, it records their actions, allowing you to analyze conversion flows and optimize your ad campaigns in your Sygnal.io dashboard.
By default, the Sygnal Pixel tracks URLs visited, domains visited, and the devices your visitors use. Additionally, you can use the Pixel’s library of functions to:
- Track conversions to measure ad effectiveness.
- Define customer segments to target visitors more likely to convert.
Requirements
To implement the Sygnal Pixel, you will need:
- Access to your website’s code base.
- Your Pixel’s base code or its ID.
- Access to your Sygnal.io dashboard.
Depending on your business location, compliance with data protection regulations such as the General Data Protection Regulation (GDPR) may be required.
Ready? Let’s get started.
#Base code
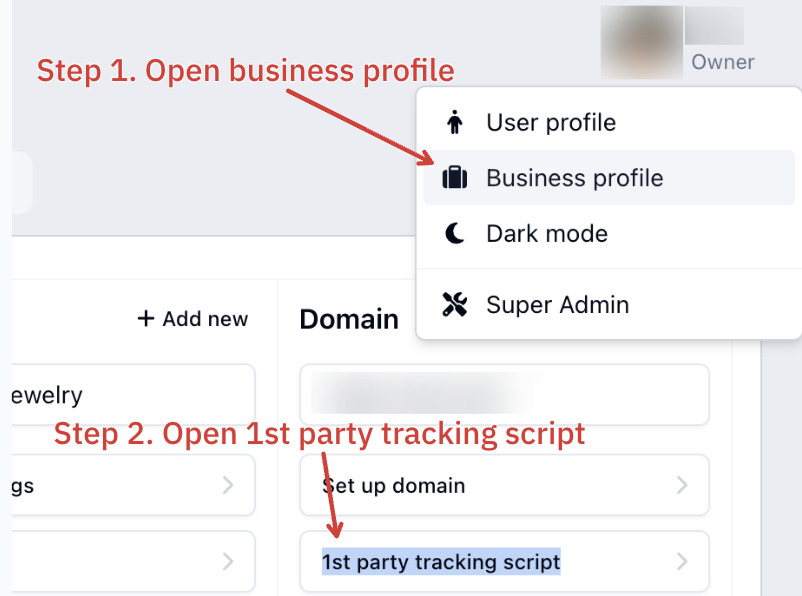
Before you can install the Sygnal Pixel, you will need your Pixel’s base code, which you can find in the Sygnal.io dashboard by clicking the profile image in the top-right corner and under “Business profile” -> "1st party tracking script".
The base Pixel code contains your Pixel’s ID in two places and looks like this:
<!-- Sygnal Pixel Code -->
<script>
!function(){"use strict";!function(n,t){var r=[];n.rrq=n.rrq||function(){function n(){r.push(arguments)}return n.q=r,n}();var c=t.createElement("script");c.async=!0,c.src="https://{your-subdomain}.{your-domain}/s/events.js",c.id="rrq",t.head.appendChild(c)}(window,document)}();

rrq("init", "{your-pixel-id-goes-here}");
rrq("track", "PageView");
</script>
<!-- End Sygnal Pixel Code -->
When executed, this code downloads a library of functions for conversion tracking. It also automatically tracks a single PageView conversion by calling the rrq() function each time it loads. We recommend keeping this function call intact.
#Installing The Pixel
For optimal performance, add the Pixel’s base code between the opening and closing <head> tags on every page where you want to track visitor actions. Typically, developers insert it into the site’s persistent header so it loads on all pages.
Embedding the code in the <head> tags helps prevent browsers or third-party code from blocking the Pixel and ensures it runs early, increasing the chances of tracking visitors before they navigate away.
After adding the code to your website, load a page that contains the Pixel. This should call rrq('track', 'PageView'), which will be recorded as a PageView signal in the Sygnals Manager dashboard.
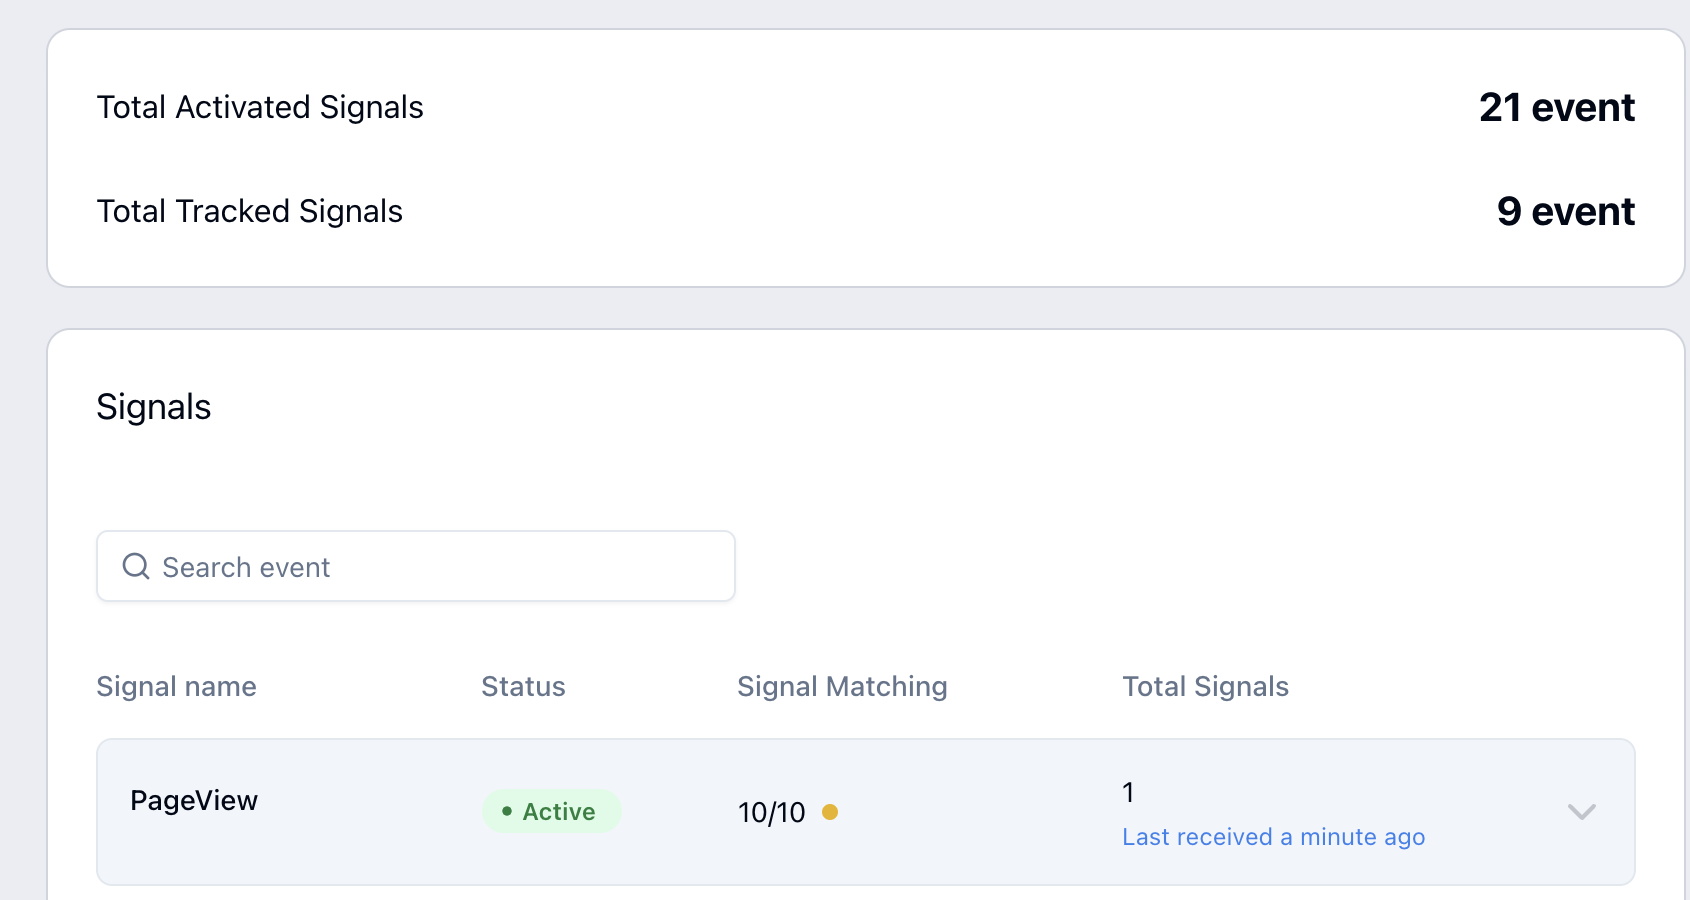
To verify the signal was tracked, go to your Signals Manager. Find your Pixel and click on its details. If you see a new PageView signal, the Pixel was installed successfully. If not, wait a few minutes and refresh the page.
Mobile Websites
For separate mobile and desktop websites, it’s advisable to add the Pixel to both. This allows you to easily remarket to mobile visitors, exclude them, or create lookalike audiences.
Installing Using a Tag Manager
While we recommend adding the Pixel directly to your website’s <head> tags, it is also compatible with most tag management and container solutions. For detailed instructions on implementing the Pixel with your tag manager, please refer to the documentation provided by your tag manager.
#Next Steps
After confirming that the Pixel is installed and tracking the PageView signal correctly, you can utilize the Pixel to:
- Set up tracking of ecommerce events.
- Track conversions.
- Create customer segments